


 3 / 4
3 / 4

TS1215 Pressure Pot
www.adhesivedispensing.co.ukinfo@adhesivedispensing.co.uk
+44 (0) 1908 686660
SETUP
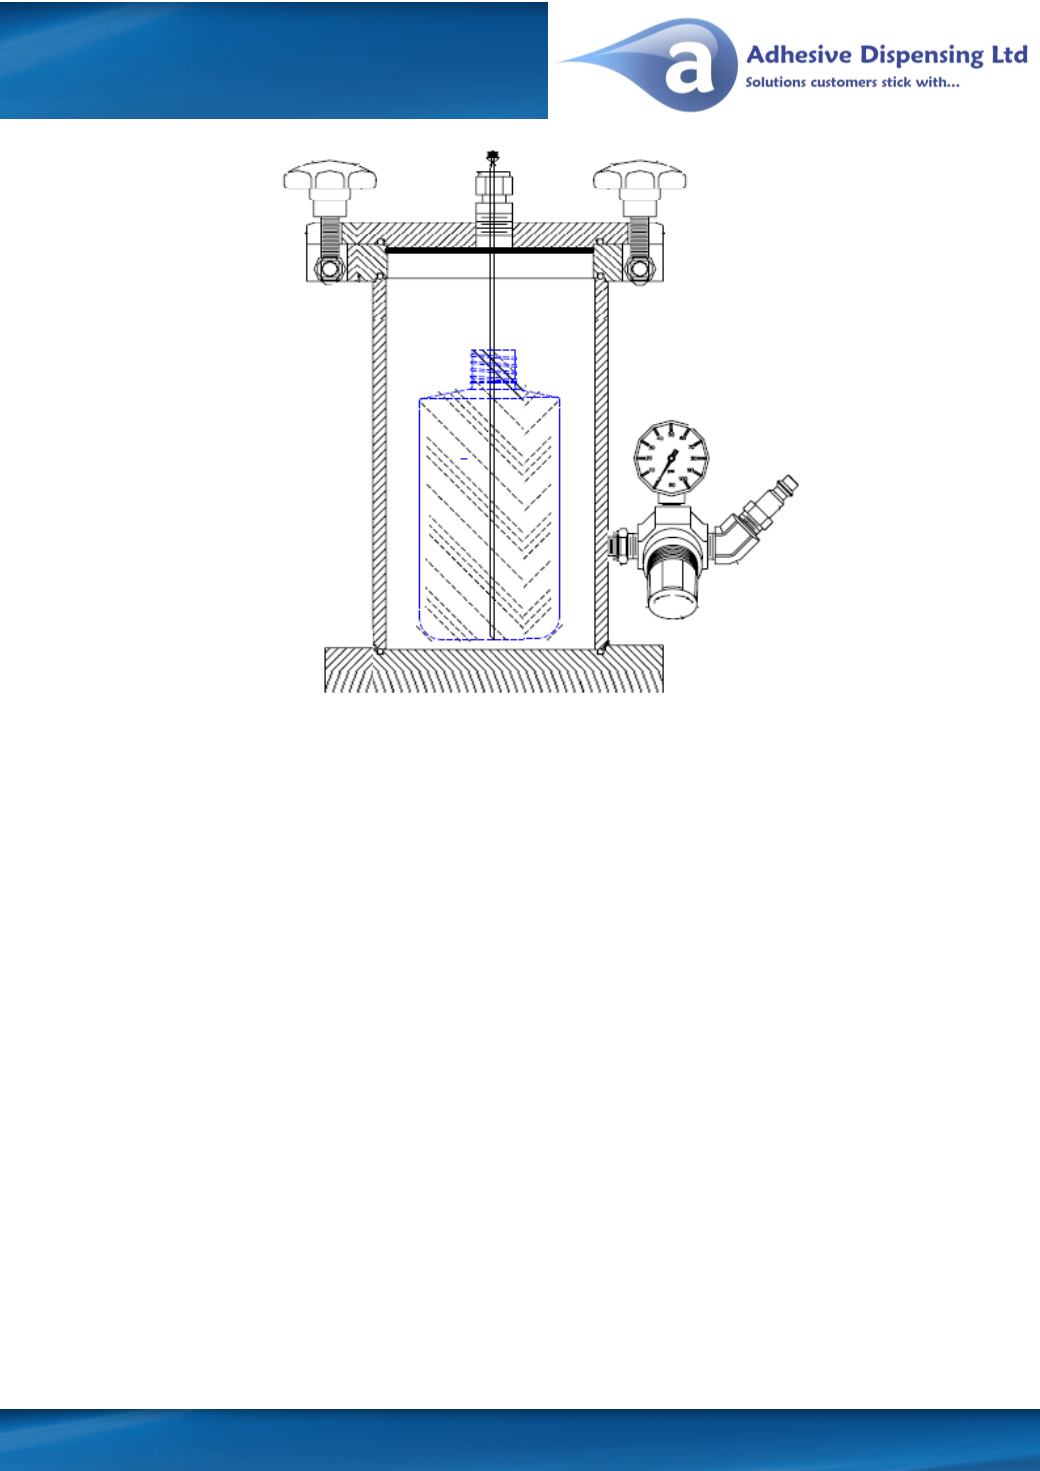
1. Remove pressure pot from shipping container and inspect for damage. Check pre-assembled Regulator
on tank side is not damaged.
2. Locate dip tube supplied - clear tube to white fitting.
3. Remove tank lid by unscrewing each of the (4) locking nuts and removing. Lift lid from the base.
4. Push dip tube through hole in top of tank lid. Attach white fitting into tank lid thread. Tighten carefully, use
a spanner if required. Do not overtighten.
CAUTION: Never pour Adhesives or other materials directly into Dispenser. Use Adhesive Bottle or similar
containment vessel.
5. Locate adhesive bottle. Remove cap supplied with new adhesive bottle. Cap may be saved for future re-
sealing of bottle.
6. Place bottle without cap/lid into the centre of the pressure pot base chamber. In the centre.
7. Place tank lid onto tank base ensuring clear dip tube sits into the adhesive bottle opening.
8. Carefully attach all 4 tank lid nuts (hand tight only).
CAUTION: Plant air supply should provide dried, filtered air with pressure not to exceed 60 psi. If plant air is
not dry and filtered, a 5 Micron Air Filter (TSD800-6) is available as a recommended accessory.
9. Insure Pressure Regulator is off (set at zero), turn Regulator Knob clockwise until it stops.
10. Attach Air Hose from filtered source (see caution above) to Threaded Air Inlet Fitting on regulator at side
of tank.
11. Attach fluid line to white dip tube connector. Attach other end to valve. Pressurise to start flow of fluid.
Air Regulator&
0-60psi Gauge
Air In
Dip Tube
Locking Nuts
Dip Tube
Thread
O-Ring