


 6 / 12

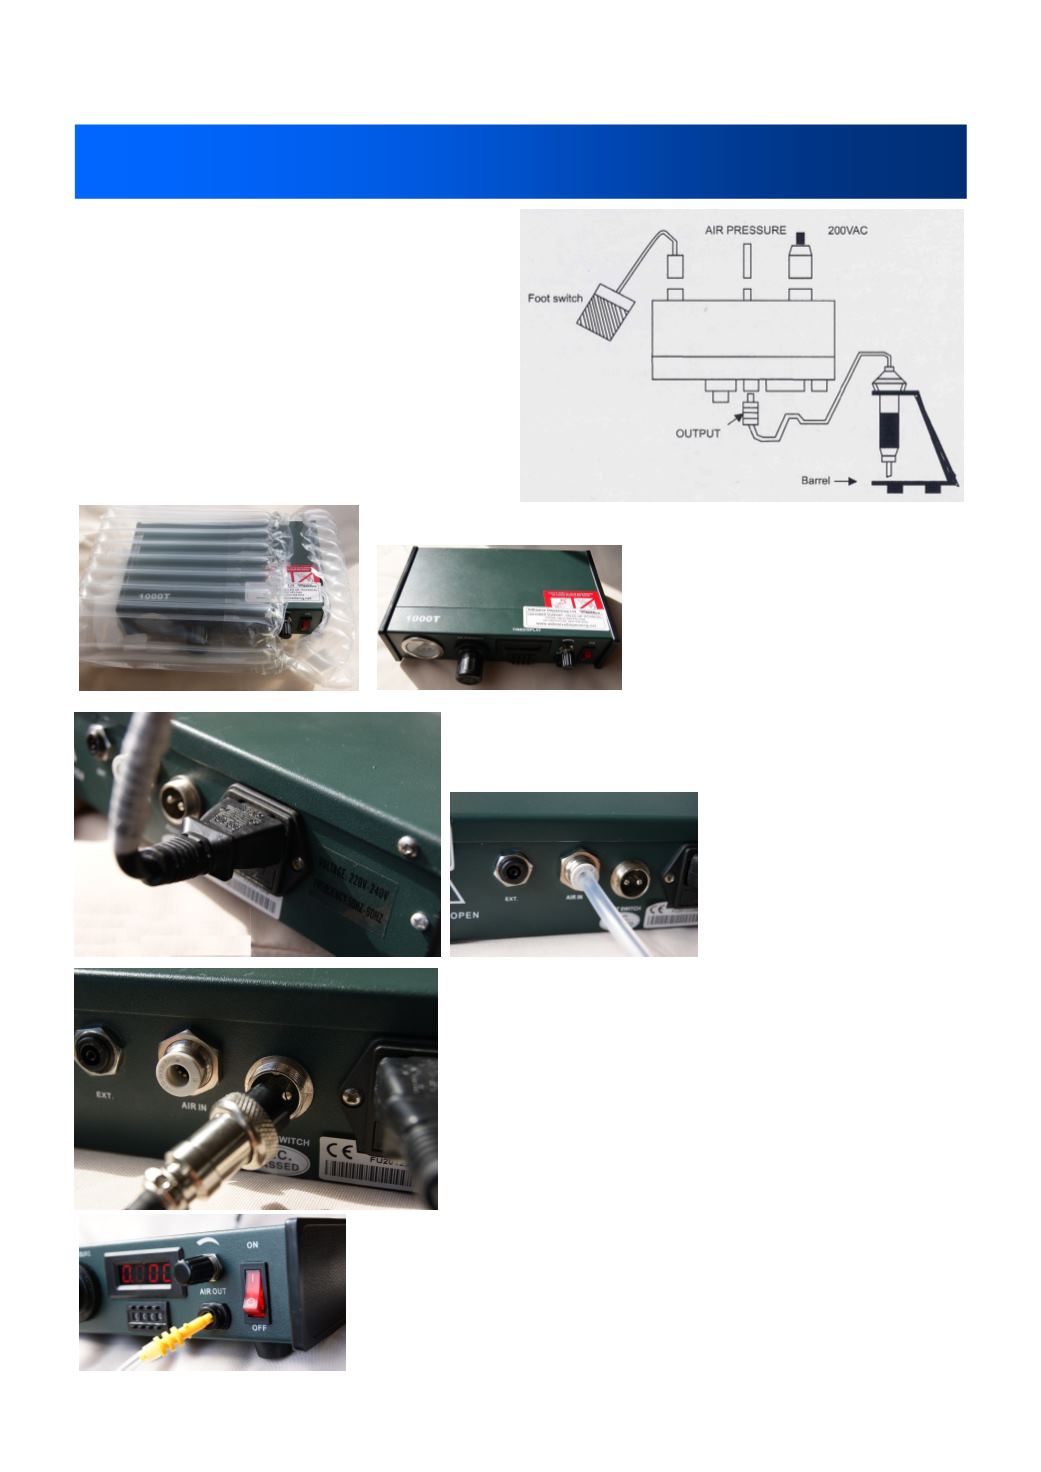
6HWWLQJ 8S
Connect to mains:
The dispenser will require a clean & dry
air connection of 80-100 psi. It is sup-
plied with a standard air pipe hose. This
will connect to a compressed air supply/
compressor. A power supply is required of
220V AC.
Remove the main dispenser unit from the
plastic packing protector bag.
Place the dispenser on a suitable flat workbench.
Ensure that the unit is in good
condition. Remove from the box
the power cord, air hose, foot
pedal, finger switch, adapter
hose, syringes & tips. Place next
to the dispenser ready to use.
On the rear of the dispenser, attach the power
cord. Find a suitable power outlet to plug in.
Take the clear airline
hose and insert into the
air in push fit connect.
Attach the other end to
your mains supply or
small compressor.
Take the footswitch or finger switch. Locate the
connector on the back of the dispenser unit. Line
up correctly and then screw the bezel until hand
tight. Do not force this fitting in. It should locate
very easily.
Turn on the power using the red button at the
front of the dispenser. The LED display will glow
red showing 0.000. Now turn on the air supply to
the dispenser.
Next attach the syringe adapter assembly. This has a yel-
low male connector fitting one end. Line up to the air outlet
on the dispenser front. Push in and turn clockwise. It will
lock in place. This connector is spring loaded so it will only
allow air to release when the connector is inserted.
6