


 8 / 12

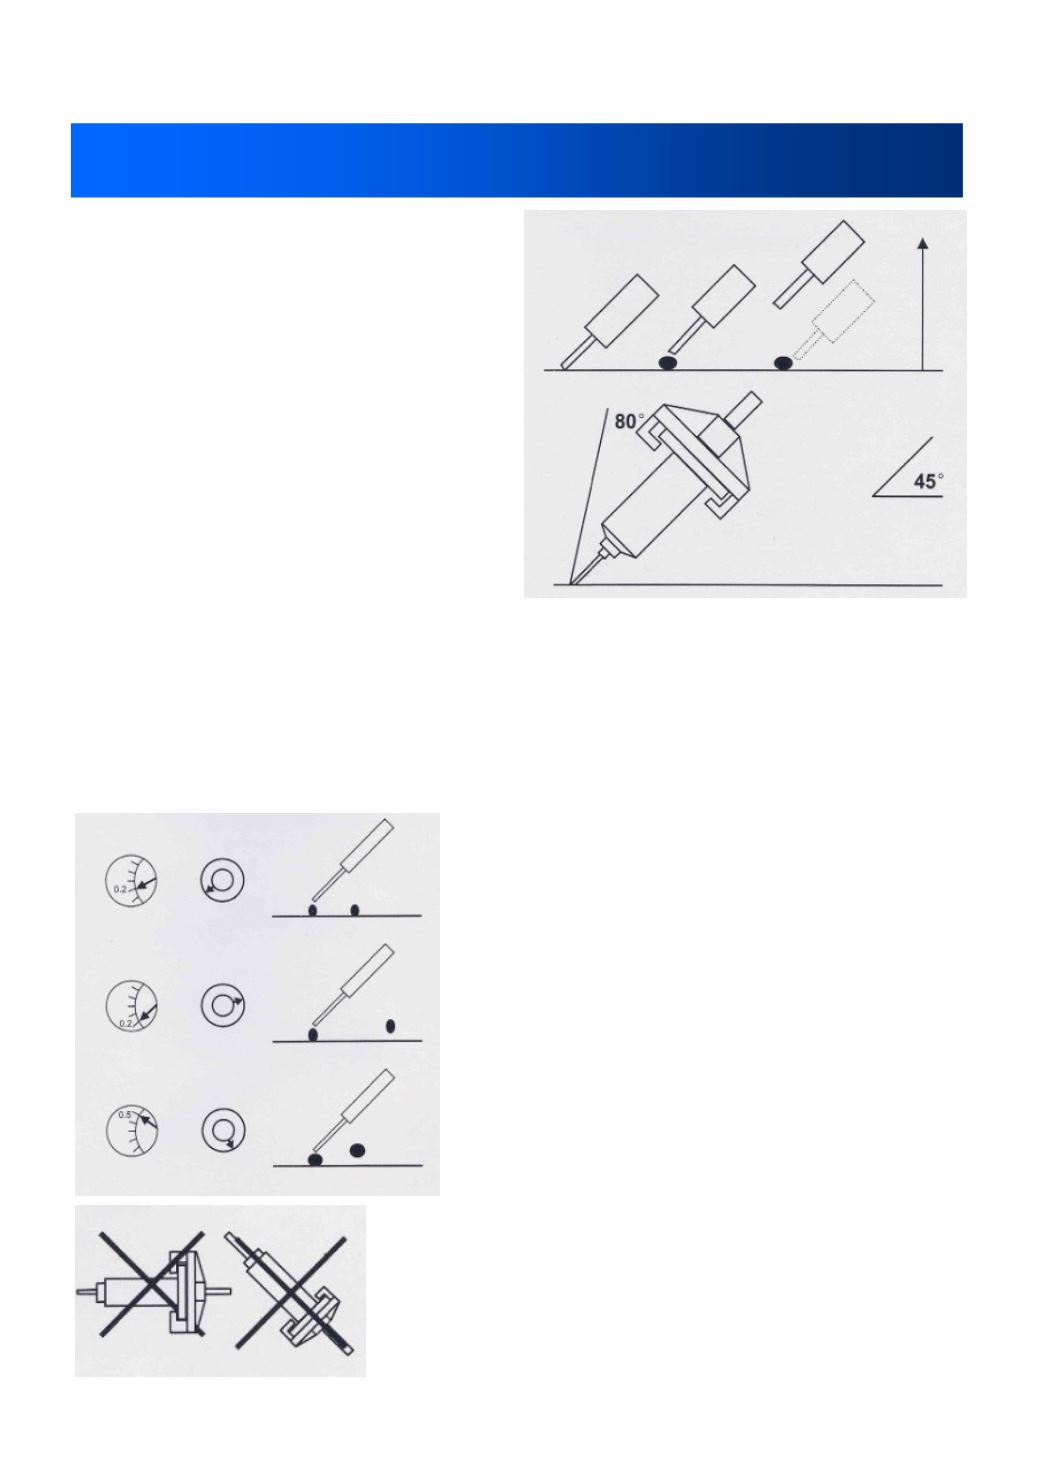
6HWWLQJ 8S
Dispensing:
With the dispensing tip attached, hold the
filled syringe barrel like a pen. Start with
a scrap piece of paper/ card and touch
the tip to the surface.
Set the air pressure to say, 15 psi. Press
the foot pedal while the tip is touching the
substrate. Allow liquid to flow. Lift off the
pedal before lifting up the tip.
If the flow rate is too slow, increase air
pressure to suit. For making beads, run
the tip along the substrate as the foot
pedal is depressed. Remember to lift off
the pedal as the bead ends, then lift up the tip.
It is ideal to angle the syringe barrel when holding for comfort. If using a syringe
stand for hands-free dispensing, the part/ product to be glued will be held to the tip
as the liquid is dispensed.
For dots, set the timer and set air pressure to suit the amount required. If liquids
drip, adjust the vacuum suckback.
Higher air pressure/ timer and tip = large timed
deposits.
Low air pressure/ timer and small tip = micro
dots.
Dispense tips are supplied in gauge sizes 14 to 32
(with 14 being the largest bore). If a tip is too
small for the viscosity of the liquid being applied,
flow rate will be too slow or the liquid might not
flow. Achieving the right deposit size is a system
of adjusting air pressure, time duration and tip
size.
Never re-use tips or barrels should cured or dried
adhesive contaminate fresh. And dried remains of
a glue can affect the dispensing performance. If
dispensing thin fluids without a piston, NEVER tip the
barrel upside down as it will cause fluid to enter the dis-
penser and is not covered by warranty. Use an inline air
filter trap (part 881-000-000) to prevent watery liquids
entering a dispenser. Available to order from stock.
8
$/:$<6 6:,7&+ 2)) 7+( ',63(16(5 :+(1 127 ,1 86( 72 &216(59( 32:(5