


 2 / 12

Part No. PSP7410022
Page 2 of 12
INSTALLATION
Each 3ØPRS set consists of 3 separate PRS units.
To install, select correctly programmed Hubbell
®
Three-Phase
Programmable Resettable Section-
alizer set with consideration to BIL, continuous
current, actuating current, deadline threshold
current, and number of counts to match the ap-
plication requirements. Ensure all 3 units in Three
Phase PRS set have the same serial number en-
graved on lower tube casting to confirm correctly
linked Three Phase PRS Set. Should there be any
concern on the use of this sectionalizer as rated,
consult your supervisor
BEFORE
installation.
INSPECTION
Thoroughly inspect the sectionalizer for visible
damage. Do not install the sectionalizer if there is
damage to any of the parts.
STORAGE
If the 3Ø Sectionalizer will not be installed imme-
diately ,it must be stored in a clean, dry location at
an ambient temperature.
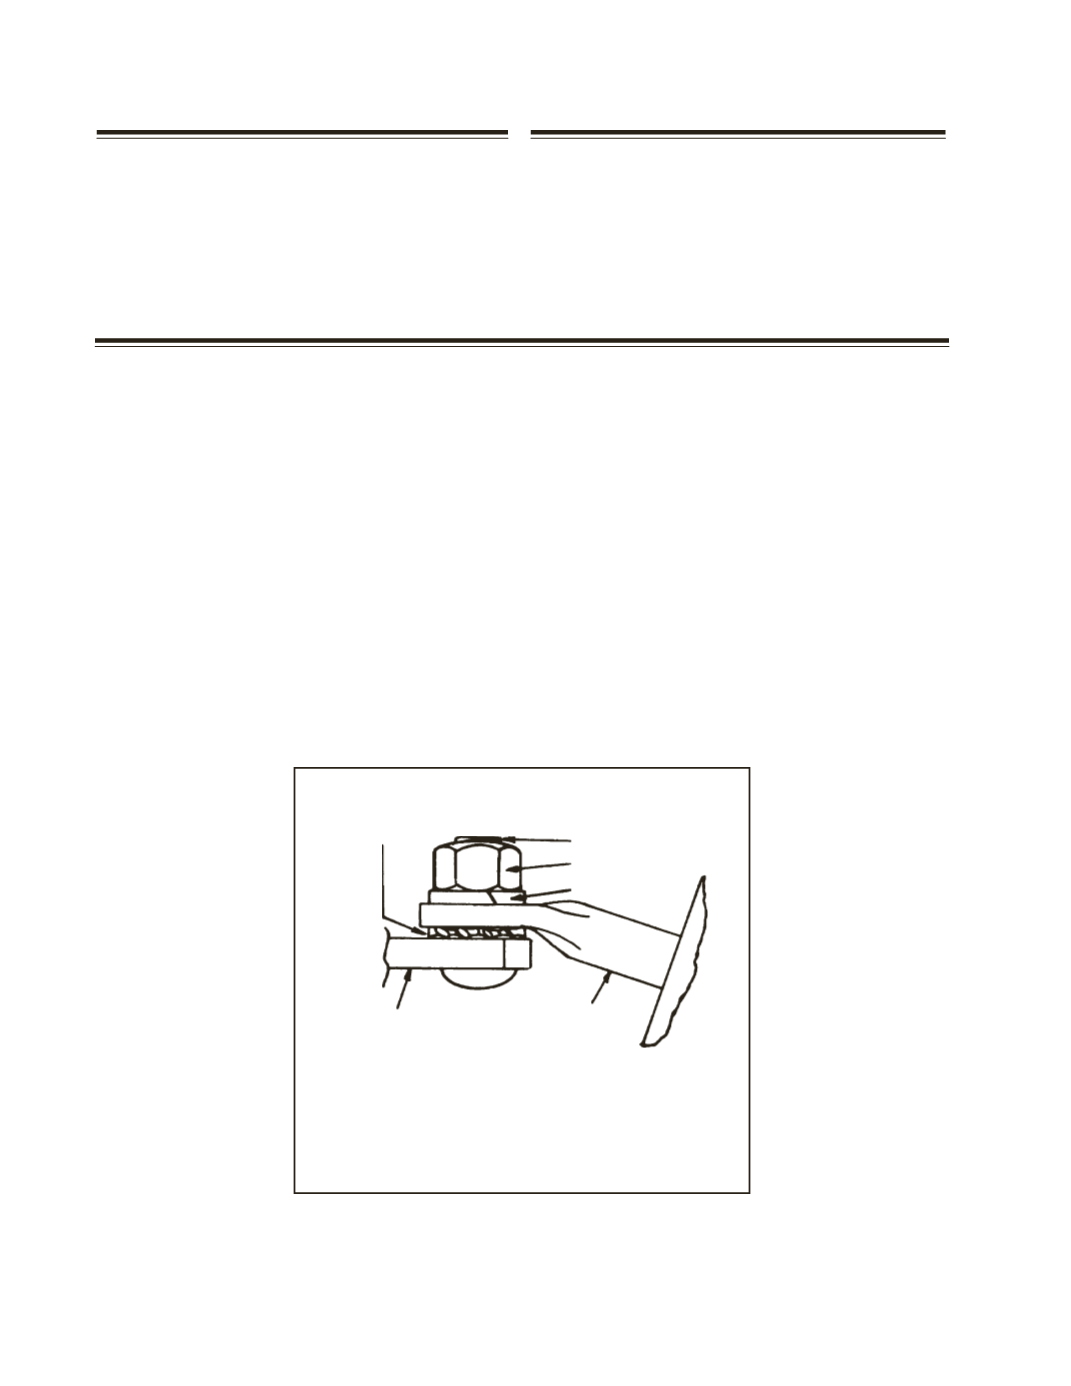
Securely attach mounting bracket to crossarm or
pole. Install the sectionalizer mounting assembly
on the mounting bracket with the external tooth
lockwasher placed between the mounting bracket
and the sectionalizer bushing support pin (see Fig-
ure 1). Tighten the nut finger-tight. Locate the
sectionalizer on the mounting bracket to provide
maximum clearance for the operator and to provide
maximum ease of operation. Securely tighten the
carriage bolt nut.
To attach electrical leads to the top and bottom
terminals, loosen the nuts on both terminals, wire
brush the conductors, and apply a coating of oxida-
tion inhibitor toboth leads. Insert leads intoterminals
and tighten nuts to approximately 20 ft. lbs.
Figure 1
SECTIONALIZER MOUNTING
ASSEMBLY INSTALLATION
EXTERNAL-TOOTH
LOCKWASHER
NUT
LOCKWASHER
BUSHING
SUPPORT PIN
MOUNTING
BRACKET
CARRIAGE BOLT